Customizing Hyperion Planning Forms in 11.1.2.3
Author: Eric Russo | 4 min read | October 3, 2014
The Problem: How do I get started customizing Planning forms using Javascript?
Being able to customize forms using Javascript is a great feature of Hyperion Planning. There are, for instance, Javascript functions that allow you to create custom validations for forms. If you’re using version 11.1.2.1, then you’re all ready to go. However, if you’re using the latest version then you have to enable this functionality. We’re going to do that in this post and then show you how to get started working with specific applications and forms.
Step 1: Enable Javascript customization for your app
Customization can be enabled for each Planning application individually. There is an application property ORACLE_ADF_UI that can be set to true or false. It controls whether or not the application user interface appears using the Oracle Application Development Framework or as presented in version 11.1.2.1. The default in 11.1.2.3 is true.
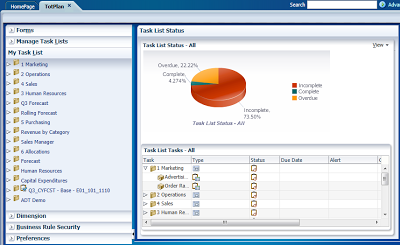
The TotPlan demo application is being used for this post. This is how it appears in the ADF UI.
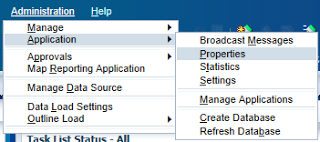
In order to change this to the 11.1.2.1 interface and thereby enable Javascript customization, we’ll open up application properties from the Administration section of the menu.
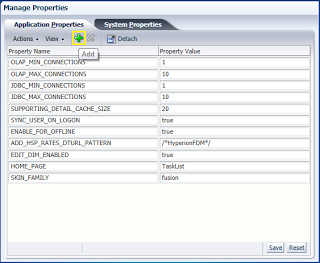
In the Application Properties tab click the add button to add the ORACLE_ADF_UI property, which isn’t listed by default.
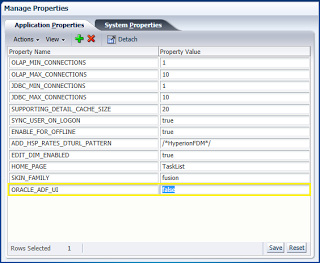
This will add a new row for the property. In the Property Name column type in the ADF property. Then set it to false since we want the old 11.1.2.1 interface.
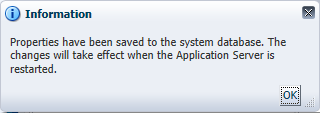
Click Save and you will get the following message. I’ve found that simply closing the application and then reopening it suffices to have the setting take effect. Your mileage may vary.
Step 2: Locate and open the ValidateData.js file
After extracting the WAR archive, locate the ValidateData.js file on your application server. A simple file search on your operating system should work to find it. It’ll be in a folder named custom. This is where you can make changes to Javascript functions to customize your forms.
There are actually three important files for Javascript customization: ValidateData.js, SampleValidateData.js, and ValidateDataHelper.js. The first is the focus of this post and includes the Javascript functions we’re going to look at to customize forms. The second file gives examples of these same functions modified for customization. The third contains utility functions that can be used to customize forms.
Here are the functions listed in the ValidateData.js file:
- customEnterPage
- customOnLoad
- validateFormcustomSaveFormPost
- drawCustomButtons
- customCellEnterPre
- customCellEnterPost
- customCellValidatePre
- customCellValidatePost
- customSpread_Pre
- customSpread_Post
Step 3: Specify the application and forms to be customized
The first thing you’ll want to do is specify where you want customization to take place. Here is a snip of code that shows how to do this.
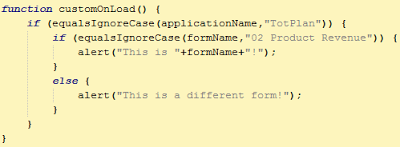
The function I’m using is customOnLoad. This function runs whenever a grid is loaded. There are three items that require explanation to show how this works.
- applicationName – This is a variable that contains the currently opened form’s application’s name.
- formName – This is a variable that contains the currently opened form’s name.
- equalsIgnoreCase – This function has two string parameters. It compares the first string to the second string while ignoring capitalization and then returns a comparison between the two as follows:string1==string2. That’s why we can use it in an IF clause; if the returned comparison is true, whatever is specified in the IF clause is executed. If the returned comparison is false, the else clause contents is executed.
The code above executes as follows:
- First check if we’re in the TotPlan application, if not, the function ends.
- Then check if the “02 Product Revenue” is the opened form.
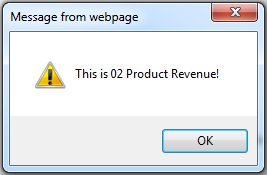
- If it is “02 Product Revenue”, an alert box opens notifying user that this is the opened form.
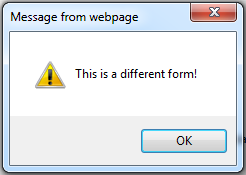
- If it isn’t, an alert box opens notifying user it’s a different form.
This is what we see when we open “03 Revenue Assump”.
And this is what we see when we open “02 Product Revenue”.
As you can see, it’s pretty simple to makes sure you’re working on only one specific application and/or form. In addition, you can use the double pipe OR operator to specify a list of forms as follows:
IF (equalsIgnoreCase(formName, “Form1?) || (equalsIgnoreCase(formName, “Form2?))
Step 4: Stay tuned for future posts
There’s much more to explore with Javascript customization of Hyperion Planning forms. From cell specific prompts to extracting metadata, administrator’s can wow users with some impressive functionality.
Subscribe to Our Blog
Never miss a post! Stay up to date with the latest database, application and analytics tips and news. Delivered in a handy bi-weekly update straight to your inbox. You can unsubscribe at any time.
