Creating Amazon RDS Instance – SQL Server
Author: Manguirish Sardesai | 5 min read | June 25, 2018
- Running SQL Server on EC2 which is very similar to running SQL Server on any Virtual Machines
- Using the Relational Database Service (RDS) provided by AWS
Running SQL Server on Elastic Compute Cloud (EC2) has its own advantages as you can have full control over different parameters, permissions and using SQL server native features. However, running SQL Server on RDS is very simple and quick and you will get the fully managed database experience from AWS relatively at the same cost. Here are the quick step by step instructions on how to create an Amazon RDS Instance of SQL Server.
- First, you need to logon to AWS Console and then access the RDS dashboard page from the AWS main menu under the ‘Database’ section. You can then click on “Launch a DB Instance.”
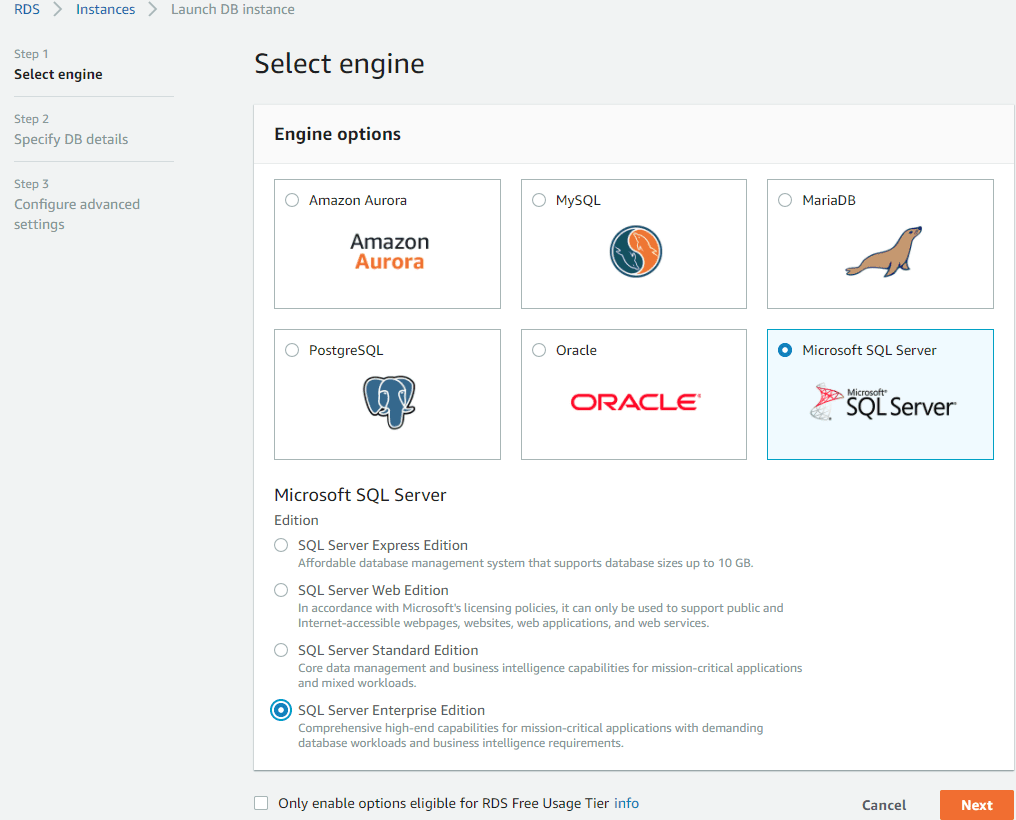
- You will get multiple options to select the database engine. Please make sure you select the engine as per business and licensing need. Here you will select “Microsoft SQL Server” and edition “SQL Server Enterprise Edition.”
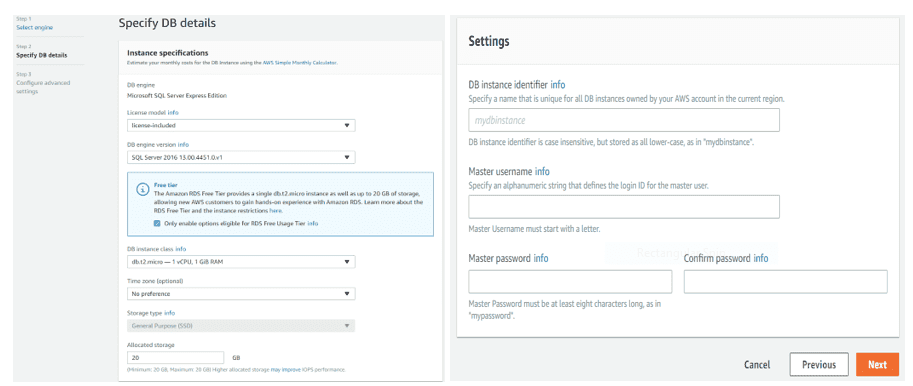
- After selecting engine, the next step you need to select is database instance specifications and settings. Here you select Licensing Model, DB Engine info, Database instance class, Storage under database instance details and Database instance name and Master username/password under settings. There are many settings here but the below needs mention:
Licensing Model: RDS for SQL Server does not have the Bring your own license model (BYOL) anymore and the only choice you have is to choose the license included option.
DB Engine Version: You need to select which SQL version needed. Latest available is SQL Server 2017 RTM which is the latest.
DB Instance Class: Here you select an instance class based on the DB Engine version selected.
Allocated Storage: Here you need to choose how much maximum storage your instance would need. This can be specified once during set-up and can’t be modified as per the AWS limitations.
- Click on Next. It will take you to the Advanced Settings configuration.
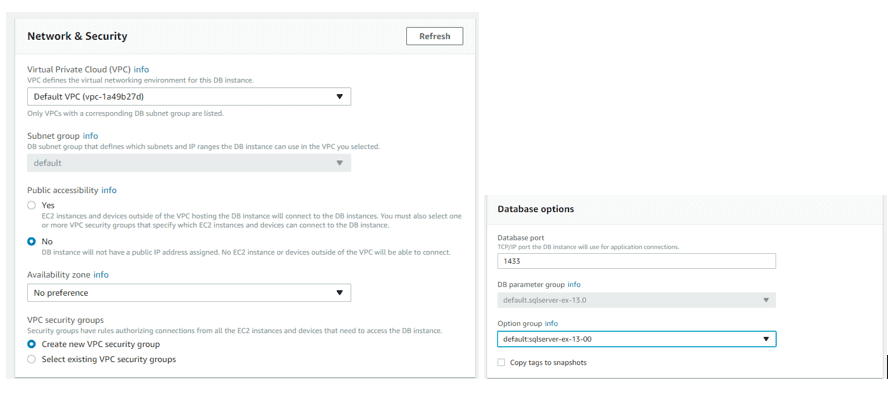
Here you get advanced options like “Network & Security,” “Database Options,” “Backup,” “Monitoring,” “Maintenance” etc. - After all options are selected, click on “Launch DB Instance” and AWS will launch the SQL Server instance for you.
- After the AWS instance is created you may encounter issues in registering it. For that you will need to change the inbound rules. You need to modify this under the “security group” section and your network admins should help you with that section.
- View the endpoint generated by the RDS Instance. Endpoint is nothing but the address of the SQL Server instance that has just been created and you can use this address in the SQL Server management studio (SSMS) or any other client tool to connect to the SQL Server instance. It has to be noted that the connecting string for the endpoint ends with the port number (1433) of the instance separated by a colon (:). You will have to replace this Colon (:) with a comma when you use this connection string in SSMS.
There you go. You are connected to your first AWS RDS SQL Server Instance.