CloudEndure Migration & Disaster Recovery
Author: Subbu Devalla | 4 min read | July 8, 2020
Traditionally, if you want to migrate or set up disaster recovery (DR) for applications or databases on-premise, Google, AWS, etc. you’ll need to have a similar or slightly lower configuration of the source machines for the DR region, which costs a significant amount of money.
You avoid high costs with using CloudEndure which saves a substantial amount with computing costs, storage costs, operating system, application costs, and licensing costs (operating systems (OS) and databases). Additional CloudEndure nearly provides zero Recovery Point Objective (RPO) and minutes for Recovery Time Objective (RTO).
This blog is going to cover the high-level steps of implementation for CloudEndure. Let’s get started.
Step 1:
Assessment: Identify the source machine, Instance Type, and networking.
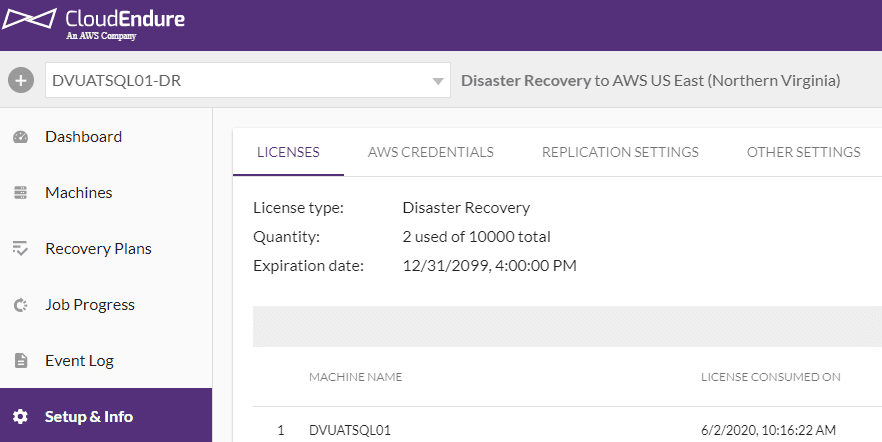
Step 2:
Create the project and define the AWS credentials, replication setting, etc.
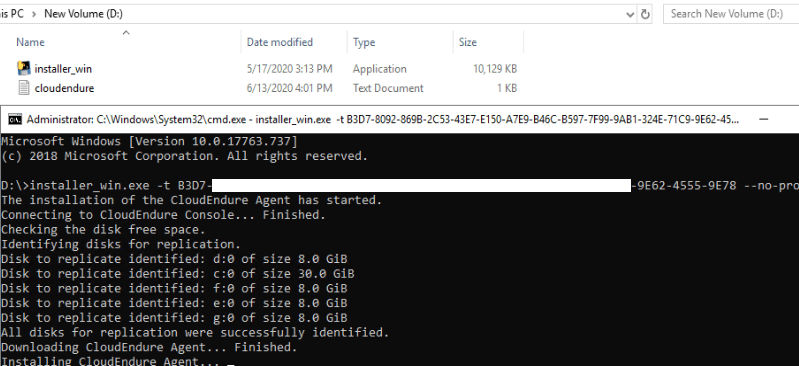
Step 3:
Download and install lightweight and non-disruptive agent and run the token that’s available in CloudEndure Project.
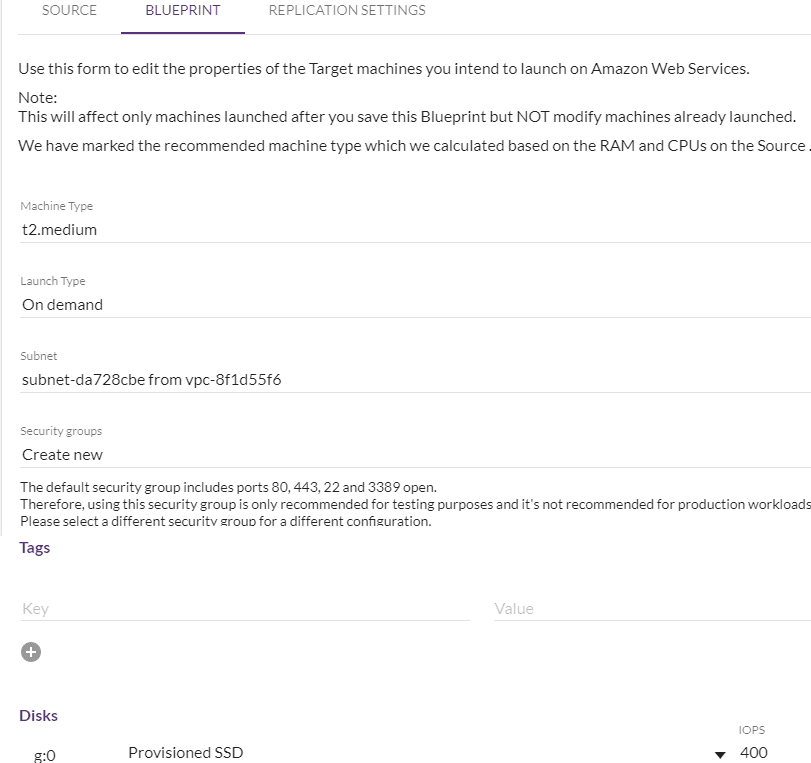
Step 4:
Configure (Machine Type, Launch Type, subnet, Security Groups, Private IP, Disk, and TAGS ) the blueprint for respective source machine. This can be updated at any given time without disturbing the replication.
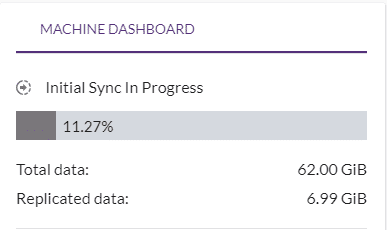
Step 5:
Wait for the initial synch to be completed. After all the source disks/data have been replicated to the staging area, incremental/data changes occur on the source will replicate to a staging area in asynchronous mode at the block level.
Note: It is a good idea to choose the higher instance type for Replication Server instance type if you have a large amount of data on the source and resize it to a lower size once the initial replication is complete, It is applicable only if the data replication needs to be completed faster.
Step 6:
Launch the “TEST MODE “machine in the target to verify the data. This can be done any number of times and can remove the target machine once verified.

Step 7:
Once everything is verified and validated do the cutover/failover. You can also integrate the post launching script in an automated way when the target is launched. By default, 30 days of snapshots are retained, maximum retention is 90 days. These numbers will change based on the source type. Snapshots are taken every 10 minutes. Reducing the number of Point in Time (PIT) snapshots can be done by opening a case with support to modify how many days snapshots are retained.
CloudEndure comes with numerous benefits being that it is easy to set up for migration or disaster recovery. It increases the uptime of application and reduces the DR cost. There is a negligible performance impact on the source application side since it is block-level replication and runs in the background. It can provide security and encryption for the data in rest and motion. You can do failover and failback depending upon the source. It also provides consistent business stability solutions that avoid downtime and data loss due to human mistakes, network issues, etc.
There is no such thing as a one-size-fits-all resolution. While many organizations are looking for migration or DR or both, CloudEndure may fit for organizations with its robust modules, cost savings and/or because it’s easy to deploy. Our cloud database experts can help you with the assessments and verdicts that you’ll need to ensure success and guide you through the entire process.
Datavail is dedicated to data migration and disaster recovery management solutions. We provide both professional and managed services delivered via our global delivery model, with leading partnerships with Microsoft, AWS, Oracle, MongoDB and other leading technologies. Contact us to learn more.